What is the function of organization in JATS Editor? #
In JATS Editor, the Organization feature plays an essential role in supporting collaborative XML editing and quota management, especially for users managing academic journals.
When a user creates an organization in JATS Editor, it serves as a shared workspace where multiple users such as journal editors, section editors, or authors can work together under the same journal entity. This is particularly useful in the context of scholarly publishing, where a single journal often involves contributions and editorial oversight from several people.
In addition to collaboration, the organization also functions as the central point for managing service quotas. If your team or journal purchases a quota package (e.g., for saving or exporting JATS XML files), the purchased quota will be allocated to the organization. All members within the organization will then be able to access and utilize that quota collectively, eliminating the need for each user to manage quotas individually.
Create an organization in JATS Editor #
1. Create in registration page #
When you first create an account in JATS Editor, you will be asked to fill in your basic information such as name, email address, and password.
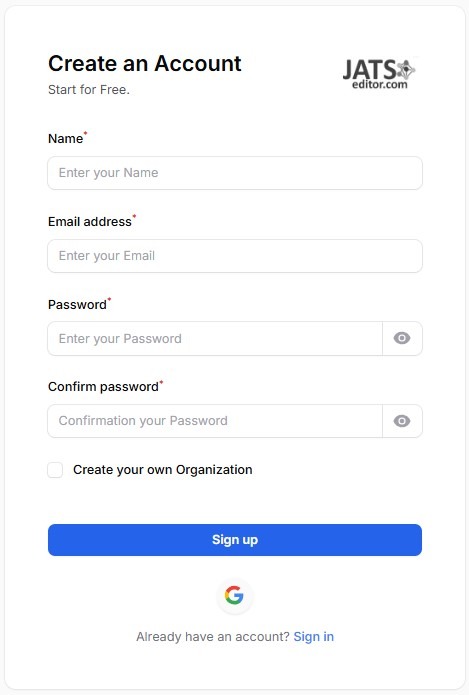
Below those fields, you will find an option labeled “Create your own Organization.” To enable this, simply check the box provided.
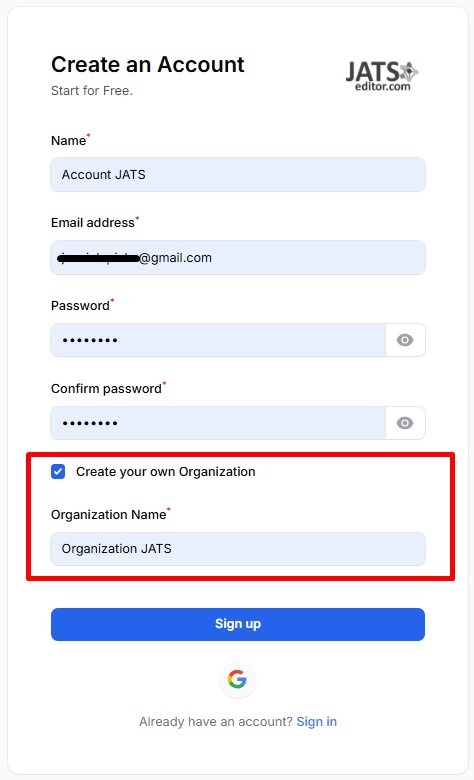
Next, fill in the name of your organization. For example, the name of your journal, institution, or publishing group.
Finally, click the “Sign up” button.
Your personal account and your organization will be created simultaneously. Once registered, you can start managing users and working collaboratively within your organization.
2. Create directly in JATS Editor page #
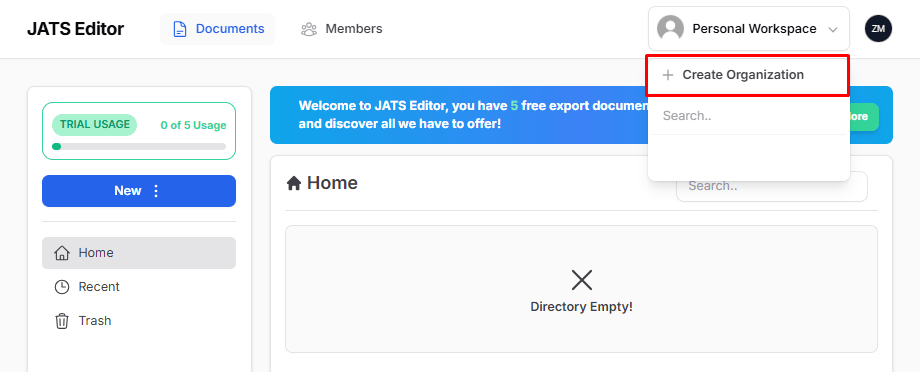
If you already have a JATS Editor account or have just registered with JATS Editor but have not yet created an Organization, you can create one directly through the JATS Editor main page.
Generally, when you first open the JATS Editor main page, you will be in your Personal Workspace. To create an organization, click on “Personal Workspace” and then click “Create Organization”
Next, fill in the name of your organization. For example, the name of your journal, institution, or publishing group.
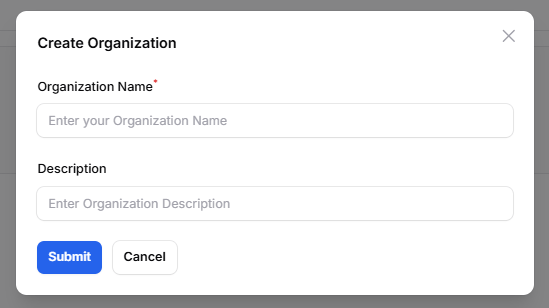
Finally, click the “Create” button
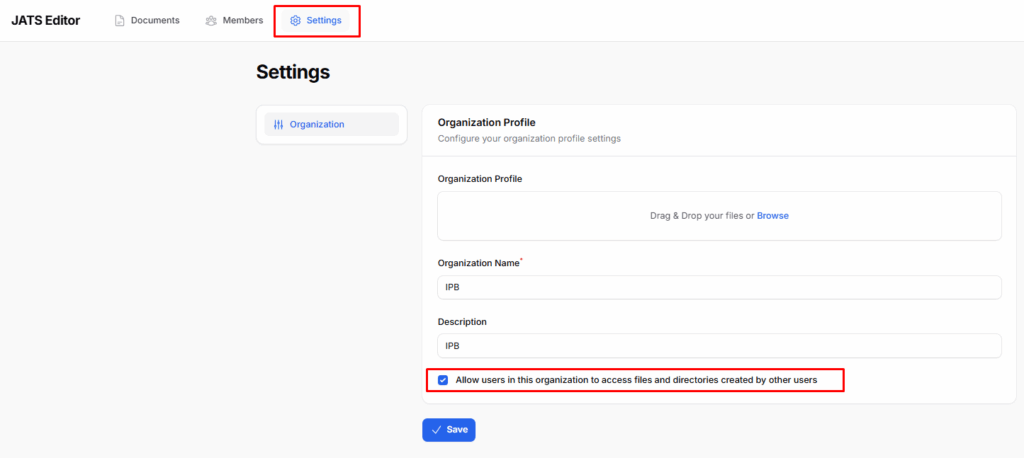
Generally, users within the same organization will not be able to see each other’s work. However, if you want each user to be able to see all other users’ work, you can enable this feature.
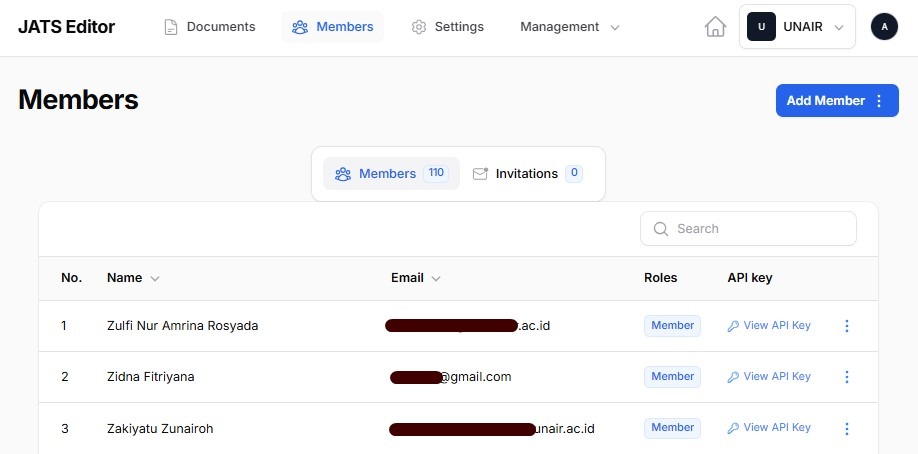
Add or Invite other users to become members of the organization on JATS Editor (Owner Only) #
Make sure you are currently in the organization where you intend to invite new users.
This ensures that the users you invite will be added to the correct workspace and will have access to the same resources, such as JATS XML files and quota, within that organization.
Then, click “Members”
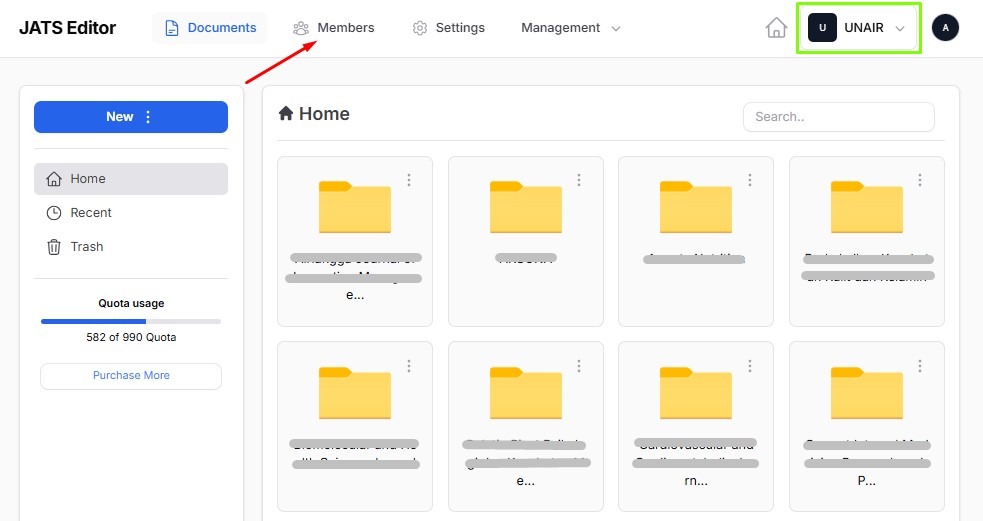
Click on “Add Member.” There are several options for how you want to add users to your organization.
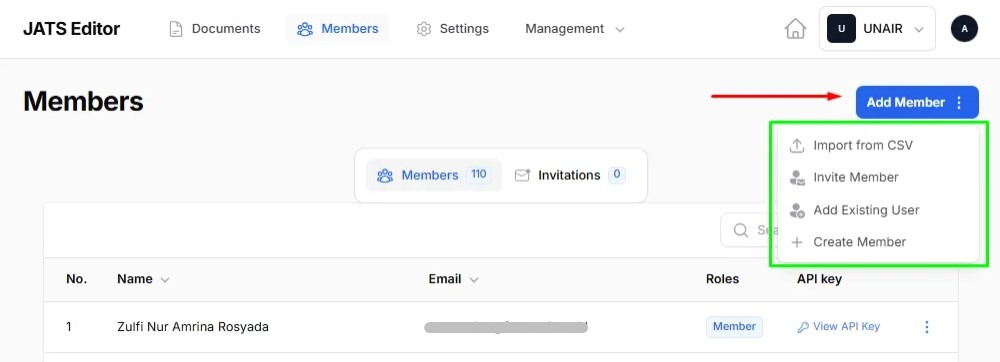
1. Import from CSV
If you add users using this feature, you must upload a CSV file containing the names and email addresses of the users to be added to the organization
Please wait a few minutes as JATS Editor needs some time to import users from the CSV file.
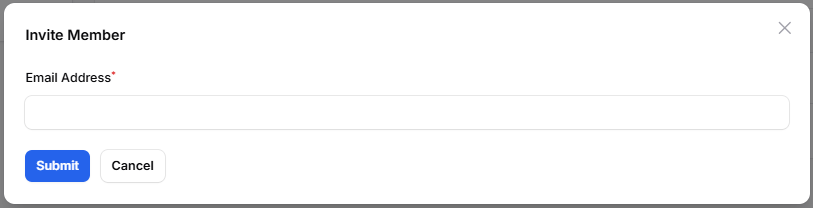
2. Invite Member
When you add a user using this feature, you must enter the user’s email address. A verification email will then be sent to that email address.
If the added user has not registered an account on JATS Editor and clicks the accept invitation button in the verification email, they will be directed to create an account first. Once the account has been successfully created, they will automatically be added to the organization.
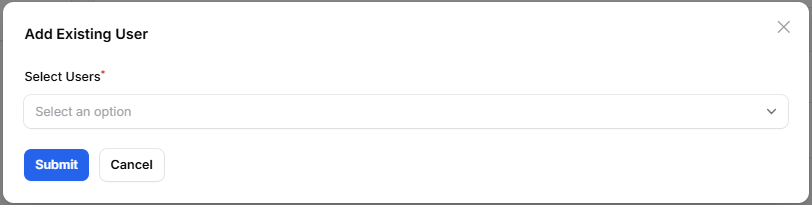
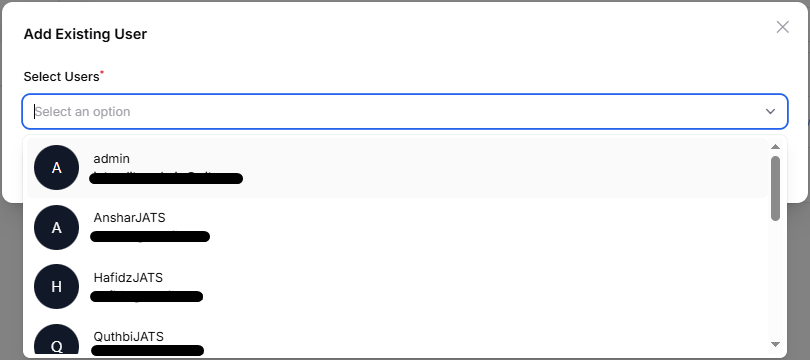
3. Add existing user
If you use this feature to add users, you must select which users you want to add. This feature is only for users who have already registered with JATS Editor.