
1. Open the JATS tab.
Click Inspect to display the JATS tags in the document. Keeping Inspect enabled makes it easier to confirm that the figure has been recognized and tagged correctly.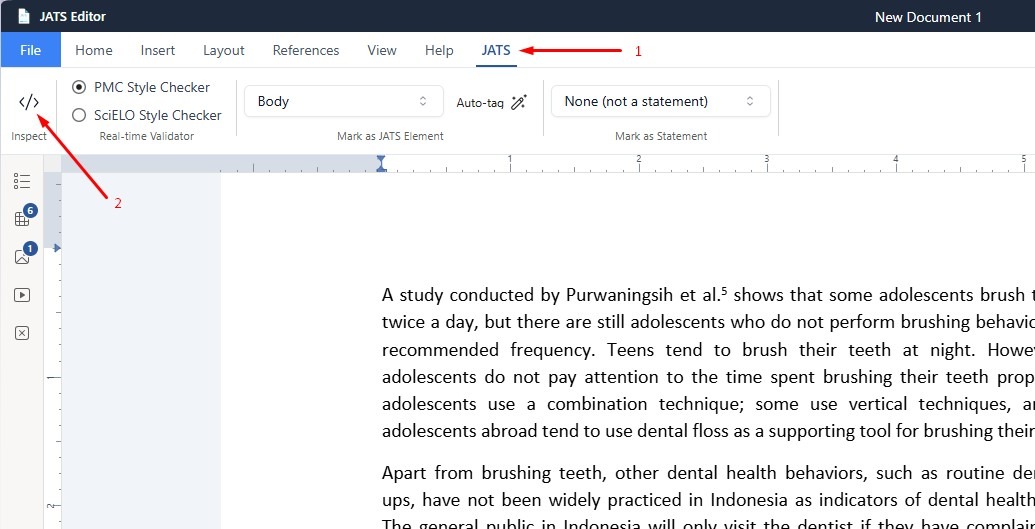
2. Open the Insert tab and click Table.
Select the number of rows and columns you need.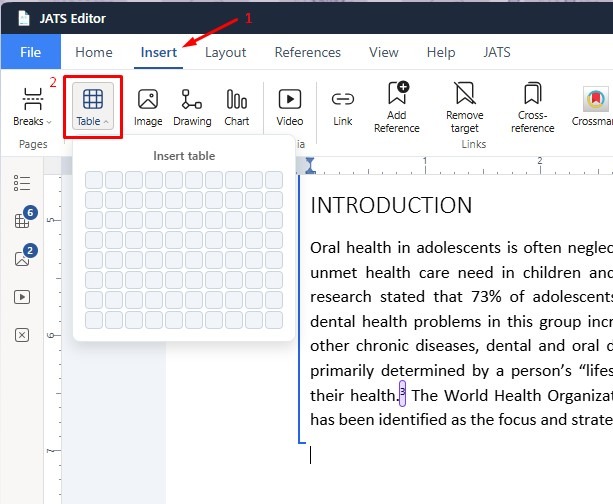
The table will be inserted into the document, enter the table content as required.
3. After the table has been inserted, you will see the Required Table JATS Data panel beside the table.
Click the Required Table JATS Data panel.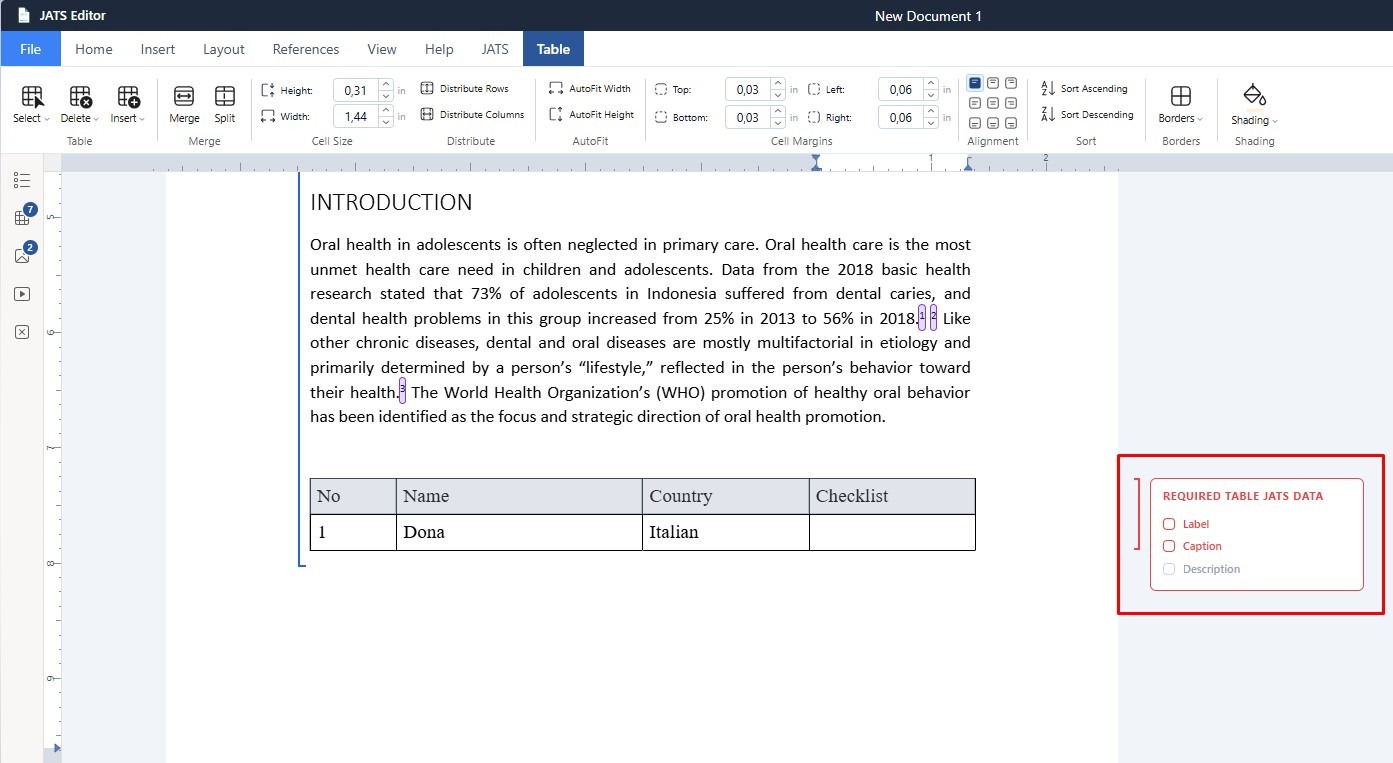
4. The Table Metadata window will appear.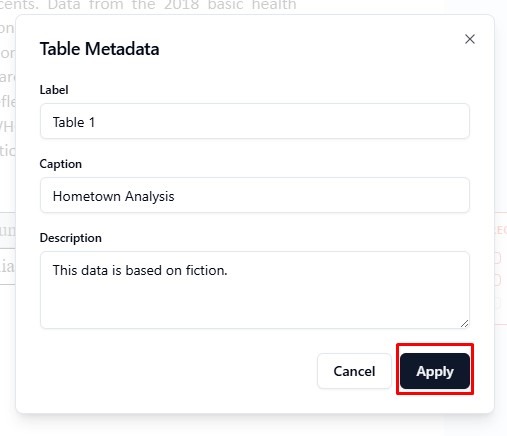
Complete the available metadata fields:
- Label – Enter the table number or identifier, for example, Table 1.
- Caption – Enter the title or caption of the table.
- Description – Add additional information or a short description of the table.
Click Apply.
4. Once the metadata has been applied, the required JATS data indicators will be marked as complete.
The label, caption, and description will also be associated with the table for JATS output.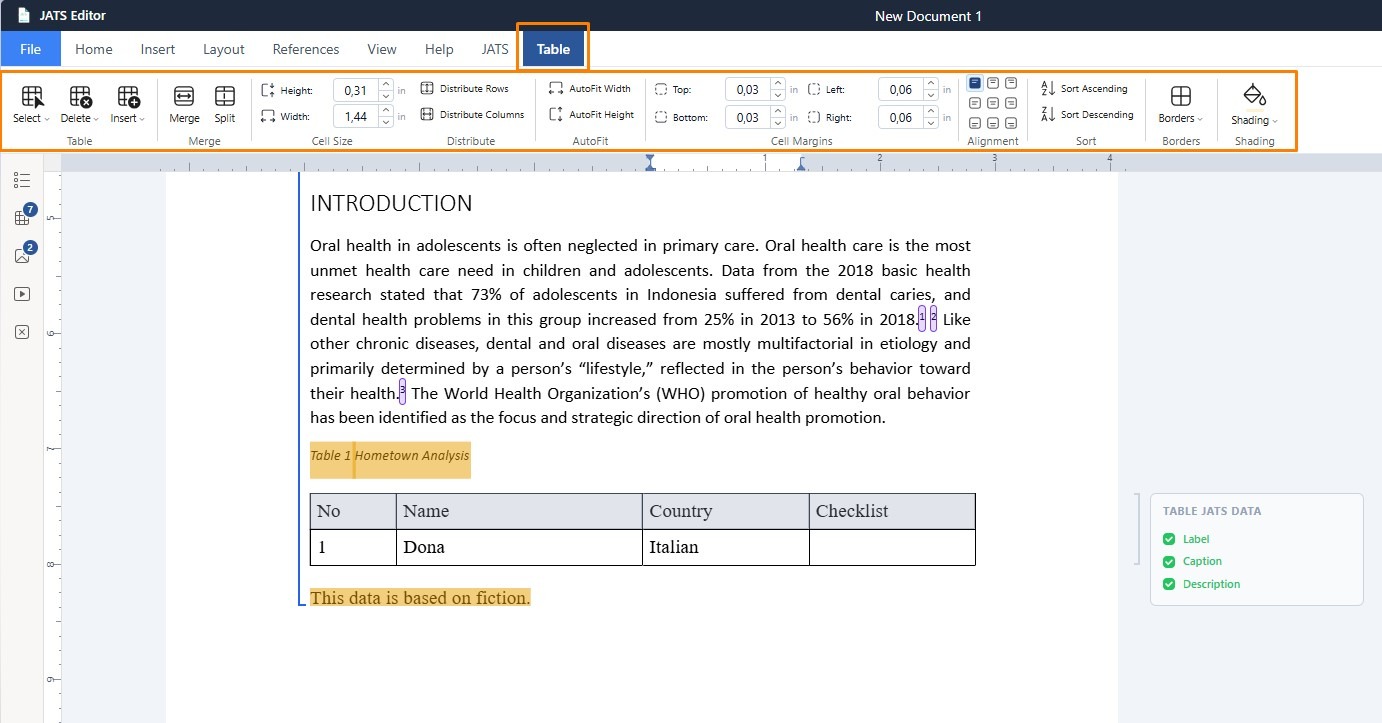
What If I Need to Modify the Table? #
If you need to change the table structure or appearance:
- Click inside the table you want to modify.
- The Table tab will automatically become available.
- Open the Table tab to access the table editing tools.
From this workspace, you can modify the table using features.
Complete the Required Table JATS Data for every table before exporting the document to JATS XML. This helps ensure that the table is correctly structured and identifiable in the final JATS document.


